Thursday, September 29, 2011

Semi-DIY iPhone Case

Since I got Pinterest, I've ad an unending supply of craft/project ideas.  Let's face it, Pinterest is what inspired me to get crafty in the first place.  A few weeks ago I found a tutorial to make my own iPhone case. When I got my phone the only case options available were solid colors or designs that involved skulls or hearts.  No thank you.  I settled for a plain purple case that I was far from in love with.  When I saw that I could make my own case I knew I had to tackle the project.

Warning:  AWFUL picture ahead. 

Semi-DIY iPhone Case

What You Need

iPhone
Clear iPhone case (I found mine for about $2 on Amazong)
scrapbooking paper, photographs...really anything you want to
scissors


What You Do

1.  Trace your iPhone onto your paper, photograph, etc.
2.  Cut out the background.  Make sure you cut out a spot for the flash.


3. Insert the paper into the back of the case, facing out.

4.  Put your phone in its case.

Here is a really terribe picture of my finished product, standing up courtesy of my ottoman.


I'm not going to lie, I'm pretty obsessed with my phone.  Okay, I was already obsessed with my phone, but it feels so new now!  I love the design and I love that I can make a new one so easily!

Sunday, September 25, 2011

True Life: I'm Obsessed

In the past few weeks I've done quite a bit of bargain shopping to build my wardrobe for fall. I've bought 11 tops.  Six of those tops were cardigans.  I bought 3 of those tops so that I could wear them underneath cardigans.  I think a fashion preference has turned into an obsession.

Saturday, September 24, 2011

A Gallery Wall to Call My Own

I've been collecting pictures, frames, signs and everything else that catches my eye to put on my gallery wall since we moved into our house at the beginning of August.  The problem is that I'm awful at hanging pictures and hate hammering so I was dreading transferring everything from a messy pile to nicely arranged on the wall.  But tonight, probably inspired by the houseguest that Paul will have over this weekend, I decided that it was time to get those frames hung. 

First I placed all my pictures on the floor in an arrangement I liked.


Then I realized that I'd left out a picture so I moved things around a little bit.


Next, thanks to a tip from Young House Love I cut out newspaper the size of each of the frames/signs and taped them to the wall using painter's tape in the arrangement I'd already made up. 


Then I nailed nails near the top-center or each piece of newspaper.  This was the worst part because It seemed like every nail was going into a stud and I bent more nails beyond repair than not.  Next I removed the paper and hung the pictures.  Here's the final product.


And here's what it looks like with everything else in that particular corner of the living room.


Overall the project wasn't as bad as I thought it would be and I'm really happy with the results. 

Thursday, September 22, 2011

My First Award

Jess from Just Rainbows and Butterflys gave me my first blog award the other day, the I Dig Your Blog Award.  You have no idea how excited I was to get Jess's facebook message the other day.  It was just what I needed to perk up an otherwise meh kind of day.  Thanks, Jess!!

The award comes with a few stipulations...

Thank the person who gave you the award.
Share three random facts about yourself

1.  I have a thing for a cappella music.  I'm super-excited that The Sing-Off is back!

2.  I hate talking on the phone, probably because I do it all day at work.  Give me a coffee date or a long rambling email anyday.

3.  I could eat a cheeseburger and fries at every meal and would probably never get sick of it.

I'm passing the award along to

Tuesday, September 20, 2011

Cup o' Joe*

Sometimes you just need a cup o' joe to get you through the day.

Sometimes you really need a cup o' joe.


And sometimes you just want to relax with an empty mug and watch some tv.


*I don't actually give my dog coffee.  I do, however, let her lick vanilla icecream off the sides of the mug.

Monday, September 19, 2011

Congratulations Zach and Jess

This weekend my and Paul's friends Zach and Jess, from justrainbowsandbutterflys, got married and we were lucky enough to celebrate with them. 
Zach and Jess have a beautiful love story and it was amazing to look back over the past two years and reflect on everything they have been through together during that time. 

Friday night was their rehearsal dinner at the O. Winston Link Museum in downtown Roanoke. Thanks to having immersed myself in the world of weddings a year ago, I'd heard of people doing events in museums. I am now a huge believer in non-traditional venues.  After dinner the museum was open so that everyone could roam around and look at the exhibits.   Paul and I even thought to take a minute to take a picture.

First Paul looked like he was about to throw his drink on his friend Daniel, who was taking the picture for us.


Then he looked a little more civilized.


Just between you and me, the first picture is my favorite.

Saturday was Zach and Jess's wedding day and I'm serious when I say that everything from the ceremony to the bride to the speeches to the first dance to the venue was just beautiful. 

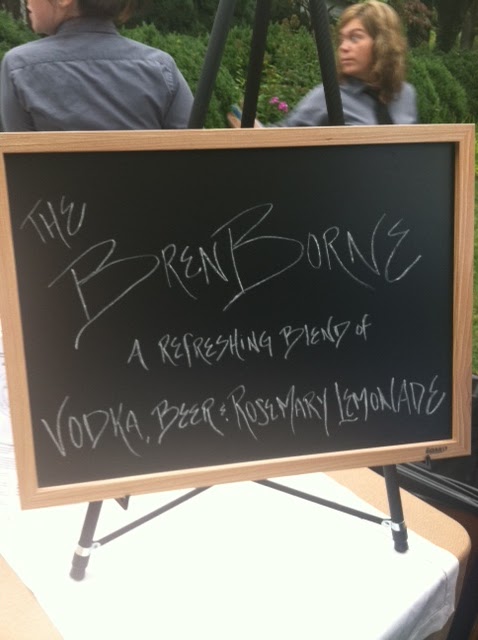
One of the many things I loved about the reception (including the shrimp and pimento cheese on a fried green tomato.  Oh. My God.) was the signature cocktail, the Brenborne.  It was served in a mason jar and perfect for the farm setting.

 
Congratulations Zach and Jess, and thank you for allowing us to be part of such an amazing day!

Friday, September 16, 2011

DIY Wreath Form

The most expensive part of making my argyle wreath that I previously wrote about was the wreath form.  It was a round piece of styrofoam that looked like this:

Thanks to a very lucky yarn sale at the craft store, I paid less for both my yarn and felt than I did for this stupid wreath form that set me back about $6.  I know, I know, $6 isn't THAT expensive, but why would I spend that when I can spend less than a dollar?  Exactly, I wouldn't!

I found this tutorial on making your own wreath form for less than a dollar from Amanda at The Penny Parlor, by way of Pinterest, and can't wait to try it. 

Please note that I haven't personally tried this tip, but I plan to when I make the Halloween yarn wreath in my yarn wreath post. 

First, go to the plumbing department of Home Depot or Lowes and get a 6 foot piece of foam tubing.  It's less than a dollar!  Next, cut the tubing to the length you want, form it into a ring and then use duct tape to secure it. 


I'll definitely update you to let you know how my own DIY wreath form and Halloween wreath go as soon as I'm done with it.

Also, check out what Amanda did with this wreath form and some coffee filters. 


Wow!  I'm not worthy!

Do you have any favorite money-saving crafting tips?