Thursday, September 29, 2011

Semi-DIY iPhone Case

Since I got Pinterest, I've ad an unending supply of craft/project ideas.  Let's face it, Pinterest is what inspired me to get crafty in the first place.  A few weeks ago I found a tutorial to make my own iPhone case. When I got my phone the only case options available were solid colors or designs that involved skulls or hearts.  No thank you.  I settled for a plain purple case that I was far from in love with.  When I saw that I could make my own case I knew I had to tackle the project.

Warning:  AWFUL picture ahead. 

Semi-DIY iPhone Case

What You Need

iPhone
Clear iPhone case (I found mine for about $2 on Amazong)
scrapbooking paper, photographs...really anything you want to
scissors


What You Do

1.  Trace your iPhone onto your paper, photograph, etc.
2.  Cut out the background.  Make sure you cut out a spot for the flash.


3. Insert the paper into the back of the case, facing out.

4.  Put your phone in its case.

Here is a really terribe picture of my finished product, standing up courtesy of my ottoman.


I'm not going to lie, I'm pretty obsessed with my phone.  Okay, I was already obsessed with my phone, but it feels so new now!  I love the design and I love that I can make a new one so easily!

Sunday, September 25, 2011

True Life: I'm Obsessed

In the past few weeks I've done quite a bit of bargain shopping to build my wardrobe for fall. I've bought 11 tops.  Six of those tops were cardigans.  I bought 3 of those tops so that I could wear them underneath cardigans.  I think a fashion preference has turned into an obsession.

Saturday, September 24, 2011

A Gallery Wall to Call My Own

I've been collecting pictures, frames, signs and everything else that catches my eye to put on my gallery wall since we moved into our house at the beginning of August.  The problem is that I'm awful at hanging pictures and hate hammering so I was dreading transferring everything from a messy pile to nicely arranged on the wall.  But tonight, probably inspired by the houseguest that Paul will have over this weekend, I decided that it was time to get those frames hung. 

First I placed all my pictures on the floor in an arrangement I liked.


Then I realized that I'd left out a picture so I moved things around a little bit.


Next, thanks to a tip from Young House Love I cut out newspaper the size of each of the frames/signs and taped them to the wall using painter's tape in the arrangement I'd already made up. 


Then I nailed nails near the top-center or each piece of newspaper.  This was the worst part because It seemed like every nail was going into a stud and I bent more nails beyond repair than not.  Next I removed the paper and hung the pictures.  Here's the final product.


And here's what it looks like with everything else in that particular corner of the living room.


Overall the project wasn't as bad as I thought it would be and I'm really happy with the results. 

Thursday, September 22, 2011

My First Award

Jess from Just Rainbows and Butterflys gave me my first blog award the other day, the I Dig Your Blog Award.  You have no idea how excited I was to get Jess's facebook message the other day.  It was just what I needed to perk up an otherwise meh kind of day.  Thanks, Jess!!

The award comes with a few stipulations...

Thank the person who gave you the award.
Share three random facts about yourself

1.  I have a thing for a cappella music.  I'm super-excited that The Sing-Off is back!

2.  I hate talking on the phone, probably because I do it all day at work.  Give me a coffee date or a long rambling email anyday.

3.  I could eat a cheeseburger and fries at every meal and would probably never get sick of it.

I'm passing the award along to

Tuesday, September 20, 2011

Cup o' Joe*

Sometimes you just need a cup o' joe to get you through the day.

Sometimes you really need a cup o' joe.


And sometimes you just want to relax with an empty mug and watch some tv.


*I don't actually give my dog coffee.  I do, however, let her lick vanilla icecream off the sides of the mug.

Monday, September 19, 2011

Congratulations Zach and Jess

This weekend my and Paul's friends Zach and Jess, from justrainbowsandbutterflys, got married and we were lucky enough to celebrate with them. 
Zach and Jess have a beautiful love story and it was amazing to look back over the past two years and reflect on everything they have been through together during that time. 

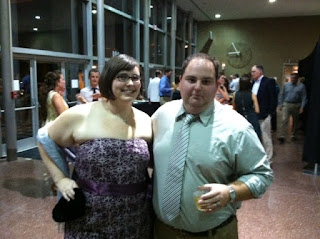
Friday night was their rehearsal dinner at the O. Winston Link Museum in downtown Roanoke. Thanks to having immersed myself in the world of weddings a year ago, I'd heard of people doing events in museums. I am now a huge believer in non-traditional venues.  After dinner the museum was open so that everyone could roam around and look at the exhibits.   Paul and I even thought to take a minute to take a picture.

First Paul looked like he was about to throw his drink on his friend Daniel, who was taking the picture for us.


Then he looked a little more civilized.


Just between you and me, the first picture is my favorite.

Saturday was Zach and Jess's wedding day and I'm serious when I say that everything from the ceremony to the bride to the speeches to the first dance to the venue was just beautiful. 

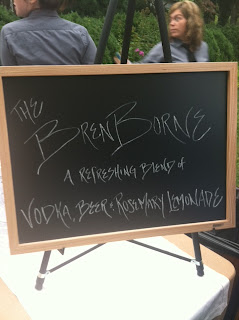
One of the many things I loved about the reception (including the shrimp and pimento cheese on a fried green tomato.  Oh. My God.) was the signature cocktail, the Brenborne.  It was served in a mason jar and perfect for the farm setting.

 
Congratulations Zach and Jess, and thank you for allowing us to be part of such an amazing day!

Friday, September 16, 2011

DIY Wreath Form

The most expensive part of making my argyle wreath that I previously wrote about was the wreath form.  It was a round piece of styrofoam that looked like this:

Thanks to a very lucky yarn sale at the craft store, I paid less for both my yarn and felt than I did for this stupid wreath form that set me back about $6.  I know, I know, $6 isn't THAT expensive, but why would I spend that when I can spend less than a dollar?  Exactly, I wouldn't!

I found this tutorial on making your own wreath form for less than a dollar from Amanda at The Penny Parlor, by way of Pinterest, and can't wait to try it. 

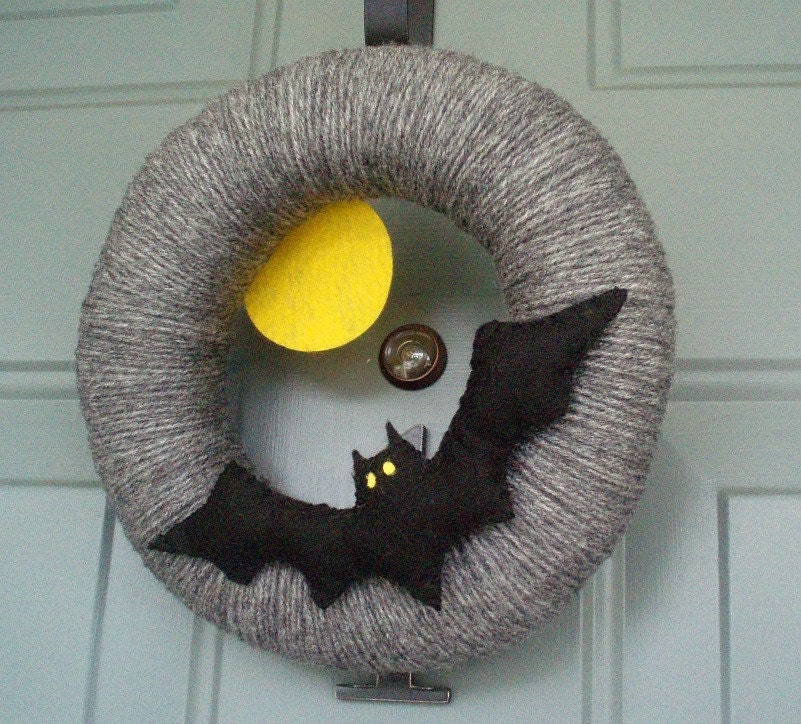
Please note that I haven't personally tried this tip, but I plan to when I make the Halloween yarn wreath in my yarn wreath post. 

First, go to the plumbing department of Home Depot or Lowes and get a 6 foot piece of foam tubing.  It's less than a dollar!  Next, cut the tubing to the length you want, form it into a ring and then use duct tape to secure it. 


I'll definitely update you to let you know how my own DIY wreath form and Halloween wreath go as soon as I'm done with it.

Also, check out what Amanda did with this wreath form and some coffee filters. 


Wow!  I'm not worthy!

Do you have any favorite money-saving crafting tips?

Thursday, September 15, 2011

Kitchen Art

I couldn't help but feel bothered by how bland my kitchen walls have felt lately, despite the bright yellow paint everywhere.  I decided to take the framed monogram that I did for my gallery wall and do something similar.  I decided  I was going to frame eating utensils and I was pumped about the idea.  And I love how it turned out.  Once again I forgot to take before and process pictures and am instead left with nothing more than a pretty blurry phone picture, but you get the idea.


Custom Kitchen Art

What You'll Need

1 picture frame, mine is 9x12*
Fabric (or scrapbooking paper)
1 spoon, 1 fork, 1 knife**
Spray paint
Hot glue gun***
Spray adhesive

What You're Going to Do

1.   Take the frame apart and paint the front of the frame.  Mine comes out from the wall a bit so I had to paint the front and back.**** 
2.  Paint the front of the  utensils the same color as the frame. 
3.  While your paint dries, cut your fabric to measure the length and width of the glass or plastic from the frame.  
4.  Using spray adhesive, attach the fabric to the plastic/glass.  Let dry.
5.  If your spray paint is dry, flip over the frame and utensils and paint the back of them.
6.  After everything is dry, put the glass back in the frame.
7.  Using a tape measure, make three marks on your fabric, equidistant from each other.  
8.  Using hot glue, attach your utensils in whatever order you desire. 

*Goodwill is AWESOME for picture frames.  If they're empty they're only .50 each and if they have art in them, they aren't too much more and you can chuck the art.  I'm telling you, a little spray paint goes a LONG way!
** I bought my utensils from Walmart for a total of three dollars.  I got 5 forks, 5 knives and 5 spoons.  The extras will be donated to my office's break room.
***I found a hot glue gun and glue sticks for less than $5 at Joann Fabrics.  It's small but it does the trick.
****PLEASE do all your spraying outdoors or in a well-ventilated garage. 

I'm more proud of my kitchen art than of anything else I've crafted lately, probably because I wasn't copying anyone--it was all my idea.  I have one other large gaping space on another wall so I'm considering doing the same thing as this one, just using a wooden spoon instead.

Do you have any "custom art" in your house?

Friday, September 9, 2011

Framed letters and Adventures in Upholstery

Lately I've been feeling pretty crafty. And I've been super-inspired by pinterest .

First I worked on a project for my gallery wall. Inspired by this little beauty:

I created this: All it took was one trip to Goodwill, one trip to Michael's and a final trip to Jo-Ann Fabric. I spray painted the frame and the letter was already white. I used spray adhesive to attach the fabric to a piece of cardboard then super glued the letter to the fabric and set a Yankee Candle on the letter for a few days so it would be good and stuck. Admittedly, I'm not the best planner when it comes to projects, hence the trip to Jo-Ann's and the slightly-off-center Y, but I like the way this one turned out.

The second project was inspired by this, another Pinterest find.

I started with this drab, pretty plain coffee table that we've used for the past two years but don't really need anymore since we got a super-sweet ottoman/coffee table combo. Conveniently, the legs screwed right off so I was left with a giant easy-to-work with slab. First I laid my fabric on the floor with the underside facing up. Then I laid batting on top of it. I was originally going to use foam padding too, but as I said before, I'm a bad project planner and I didn't have enough foam. So I just used batting and fabric. We likely won't have many people sitting on it so plush-ness isn't a huge concern. Plus, that helped this project come in at just under $20!

Next I laid the table on the batting, bottom side up.

Next I pulled the fabric and batting tight around the side and secured it with a staple gun. Fun fact though, "universal staples" aren't universal. Universal staples do not fit the staple gun that I purchased, despite the fact that they were 6mm and the gun is supposed to take 6mm staples. But the kind Lowes employee in the door department had me covered.
Then all I had to do was screw the legs back in and flip her over. I really like how it turned out. I still need to paint the legs brown since it was raining today, but I'm doing that this weekend.

I've since painted the legs brown to match the fabric, but it's not showing up well in photos and not really worth showing, so let's use our imaginations, shall we?  Good.

Before my little makeover this table was sitting across from the front door and was where I threw my purse and mail when I came in the door. It will still do that, it will just look snazzier doing it now.

Gallery Walls

I'm absolutely obsessed with gallery walls these days.

Seriously people, how awesome are these?


There are some out there that are made up of lots of frames of the same color, but that's really just not my style. I love how these include signs and graphics and not just photos. There are still some boxes to be unpacked, an office to organize and a guest bed to put together (stop judging me), but this is one project that I'm looking forward to tackling someday soon.

Blast From My Past

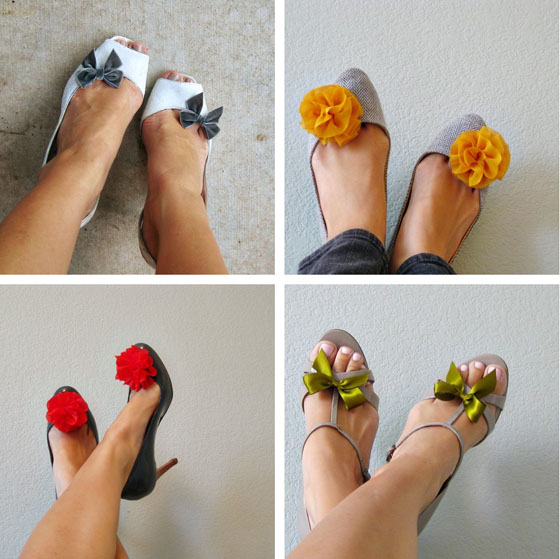
I was perusing Pinterest on my phone just now and one of the first items I saw was shoe clips. I guess I'd seen them before but I forgot about them. Basically, you just clip the little bow, flower, whatever, on your shoe to jazz them up a little.


Cute, right? But this post is not about shoe clips. This post is about what shoe clips made me think of...


I'm pretty sure I had this exact pair. I loved the squeaky sound they made when they "bit" down on my laces. I also had a more rubbery Treasure Troll version but stuff always got stuck in their hair. I'm pretty sure my brother had Ninja Turtles. I only hope that one day when I have kids I'll be able to find bow biters for them.


Thank you Pinterest for this little walk down memory lane. Did you have bow biters when you were a kid? Did you love them as much as I did (and still do)?

DIY: Argyle Yarn Wreath

I have a new obsession, folks.

Wreaths. To be specific, yarn wreaths.
They're inexpensive, not too hard to make and completely precious! Just look at some of my favorites from Pinterest!


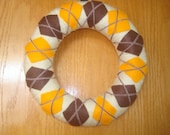
I have definite plans to make the American flag, candy cane and Halloween wreaths and I already tried my hand at the argyle wreath (because you know I love me some argyle) a couple weeks ago. Take a look.


I'd say the hardest parts of the project were picking out my color scheme and cutting out the diamonds. I learned that night that I am AWFUL at drawing and subsequently cutting out both diamonds and triangles. I'm also awful at taking tutorial pictures. But here's what I did...

Argyle Yarn Wreath Tutorial

What you will need:
Yarn

Felt to make diamonds

Foam wreath form (or plumbing tubing formed into a circle and duct taped in place)

Cardstock (for making diamond stencil)

Push pins

Glue (hot, super, tacky, fabric...choose your weapon)

Ribbon

What You'll do
1. Choose your color scheme. I chose charcoal gray, heather gray and that bright, sunny yellow. Happily, I have leftovers I can use on the Halloween wreath.

2. Tie one end of the yarn around the wreath and secure with a knot, then wrap the entire thing until it's all covered without any holes. I took my time so that I wouldn't have to do second layer. Tie a knot at the end.

3. Cut out your diamonds. Like I said before, I'm awful at drawing and cutting. So I folded a piece of cardstock in half and drew a small triangle. Then I cut it out, unfolded it, and had a diamond. I used that triangle to trace the rest of my diamonds, half yellow and half gray.

4. Pin your diamonds to the wreath where you want them. This helps to prevent them from going all over the place.
5. Wrap your yarn around the wreath once more to create the criss-cross pattern. Do one diagonal first and then the other.

6. When everything looks the way you want, remove the pins and use glue to permanently secure the diamonds.

7. Loop a ribbon around the top so you'll have something to hang it by. I still haven't done this to mine but plan to...someday...
Sources:

Hi, hello!

Welcome to the new digs!

I decided to start a new blog from scratch for a few reasons.  The first was purely out of laziness.  I created my old blog using my old email with my maiden name in it.  That meant that whenever I wanted to blog I had to sign out of my new Google account and sign in to my old Google account.  It might not sound bad but it felt like a huge pain.  There could have been a way to switch the email associated with it, but I couldn’t figure it out.  Another reason I wanted to switch things up was that I really hated my old blog’s name pretty much immediately.  I mean, Trista’s Gobbledygook?  WTH was I thinking?!  I could barely remember how I spelled it.  And it hardly gave an indication of the content.  Finally, the content of what I posted was just too random.  One day I’d write about the dog and the next month (which was the next time I blogged) was about salad.  Unacceptable.
The content of Crafting and Cardigans will still be a little scattered, but hopefully I’ll be inspired to blog a little more often so that things feel consistent.  I’m a wife, daughter, sister, friend, graduate student and bureaucrat who cooks, crafts, reads, and shops, and that’s pretty much what I’m going to be writing about.  Also, I will occasionally end sentences with a preposition.  Let’s go ahead and agree now that we won’t get upset about that.  Agreed?  Good.